
For years, I treated cooking temperatures as something I only needed to think about when a recipe gave me an oven setting. Preheat to 350°F, bake for 30 minutes, and that was about as far as my temperature knowledge went.
The more I cooked, the more I realized that temperature is actually one of the most useful ways to understand what is happening to food.
Why did one chicken breast come out juicy while another was dry? Why did vegetables sometimes roast beautifully and other times turn soft and watery? Why did a steak brown in one pan but steam in another? Why did fried food occasionally come out crisp and other times absorb half the oil in the skillet?
Usually, temperature had something to do with it.
Once I started thinking about heat instead of simply following cooking times, I became much more consistent in the kitchen. I also became less dependent on recipes. I could look at what was happening in the pan, check a temperature when necessary, and make an adjustment before dinner was ruined.
This guide covers the temperatures I think every home cook should understand, from safe internal temperatures for meat to oven settings, frying oil, simmering water, sugar, and carryover cooking.
The goal isn’t to memorize every number on this page. It’s to understand what the numbers mean.
The Three Temperatures I Think About When Cooking
One of the things that initially confused me about cooking temperatures was that people use the word temperature to describe several completely different things.
When I’m cooking now, I generally think about three temperatures.
1. The temperature of the cooking environment
This is the temperature of the oven, pan, grill, water, or oil surrounding the food.
For example:
- A 350°F (175°C) oven
- 375°F (190°C) frying oil
- Simmering water at roughly 185–205°F (85–96°C)
- A very hot skillet used for searing
This determines how quickly heat reaches the food and what happens to its surface.
2. The internal temperature of the food
This is the temperature in the center of whatever you’re cooking.
A chicken breast might be sitting in a 425°F oven, for example, while its center is only 140°F.
Internal temperature is especially important for meat, poultry, fish, egg dishes, reheated food, and anything where doneness or food safety matters.
3. The temperature at which food changes
Finally, there are temperatures where specific culinary reactions happen.
Water evaporates. Fat renders. Proteins firm up. Sugar caramelizes. Browning accelerates.
You don’t need to know the chemistry behind every one of these reactions, but recognizing that food behaves differently at different temperatures makes cooking much easier to understand.
That distinction alone cleared up a lot of cooking confusion for me.
Why I Rely on a Thermometer More Than a Timer
A recipe might say to roast chicken for 25 minutes, but 25 minutes doesn’t tell me whether the chicken is actually done.
The chicken breast might be unusually thick. It might have gone into the oven colder than usual. My oven might run 15 degrees cool. The pan might conduct heat differently from the one used to develop the recipe.
Time is an estimate.
Temperature tells me what’s actually happening.
That’s why an instant-read thermometer is one of the few kitchen gadgets I genuinely think almost everyone should own. I use mine for far more than large roasts. I’ll check chicken breasts, pork chops, fish, bread, frying oil, and even leftovers.
There are plenty of visual clues that help determine doneness, and we’ll get to those. But when safety matters, I don’t like guessing.
Safe Internal Cooking Temperatures
If there’s one section of this guide worth bookmarking, it’s this one.
For home cooks, these are useful minimum internal temperatures to know:
| Food | Minimum Internal Temperature |
|---|---|
| Whole cuts of beef, pork, lamb and veal | 145°F / 63°C + at least 3 minutes rest |
| Ground beef, pork, lamb and veal | 160°F / 71°C |
| Chicken, turkey and other poultry | 165°F / 74°C |
| Ground poultry | 165°F / 74°C |
| Fish and most seafood | 145°F / 63°C |
| Egg-containing casseroles and dishes | 160°F / 71°C |
| Reheated leftovers | 165°F / 74°C |
These reflect current USDA/FDA home food-safety guidance. The USDA recommends 145°F followed by at least a three-minute rest for whole cuts of beef, pork, lamb and veal; 160°F for ground meats; and 165°F for poultry. The FDA recommends 145°F for most seafood and 160°F for egg-containing dishes such as casseroles.
Local food-safety recommendations can differ slightly by country, so I treat these as a practical baseline rather than assuming every food authority in the world uses identical rules.
Where to Put a Meat Thermometer
Owning a thermometer doesn’t help much if I stick it into the wrong place.
I try to measure the coldest part of the food, which is usually near the center of the thickest section.
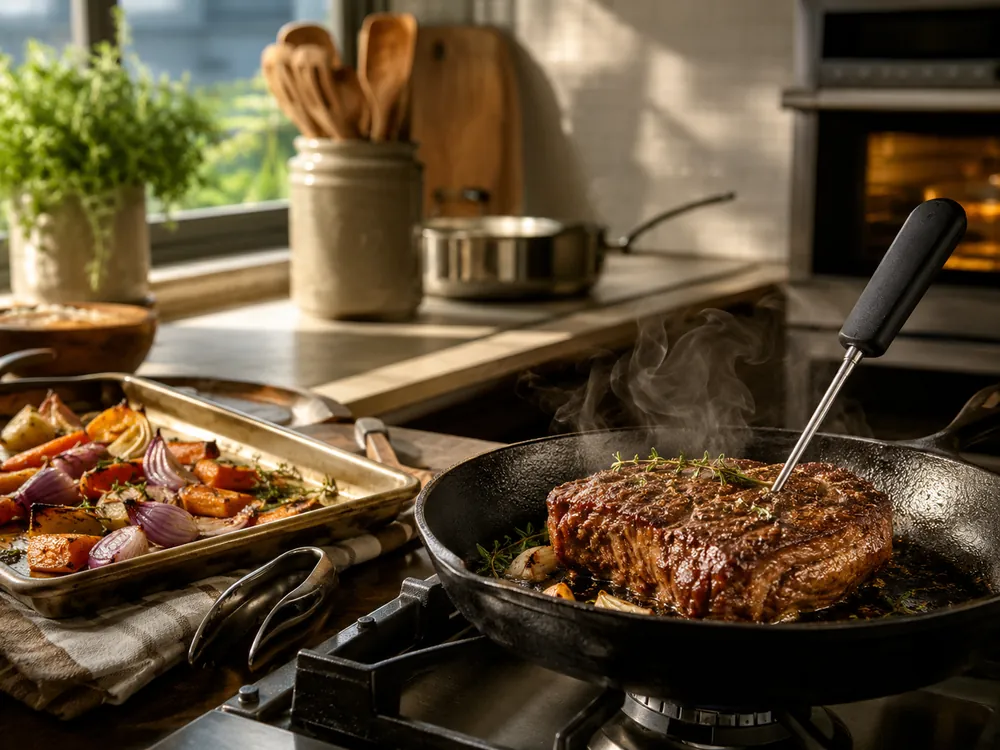
For a chicken breast or steak, I insert the probe from the side when possible so that the tip reaches the center.
For a whole chicken or turkey, I check the thickest part of the breast and the innermost part of the thigh without touching bone.
For a roast, I aim for the center of the thickest section.
I also check more than one spot when something is large or irregularly shaped. A roast can easily be several degrees warmer in one area than another.
And I avoid touching bone, the pan, or a large pocket of fat with the thermometer tip because all three can give misleading readings.
Carryover Cooking: Why Food Keeps Cooking After You Remove It From the Heat
This was one of the most useful cooking lessons I learned.
Food doesn’t immediately stop cooking when it leaves the oven or pan.
The outside is usually hotter than the center, and some of that heat continues moving inward while the food rests. As a result, the internal temperature can continue rising.
That’s carryover cooking.
It matters most with larger pieces of food.
A big roast may climb several degrees during its rest. A small fish fillet might barely change at all.
This is why experienced cooks sometimes remove food shortly before it reaches their final desired temperature, provided food-safety requirements are still being met.
I don’t try to calculate carryover cooking to the exact degree. I simply remember that the larger and hotter the piece of food is, the more likely its temperature is to continue rising after I remove it from the heat.
Understanding Meat Temperatures
Meat is where temperature becomes especially useful because relatively small differences can completely change the texture.
With whole cuts of beef, for example, increasing the internal temperature causes proteins to tighten and moisture to be squeezed out. That is why a steak becomes progressively firmer and less juicy as it cooks further.
You’ll often see culinary doneness described approximately like this:
| Doneness | Typical Internal Temperature |
|---|---|
| Rare | 120–125°F / 49–52°C |
| Medium-rare | 130–135°F / 54–57°C |
| Medium | 140–145°F / 60–63°C |
| Medium-well | 150–155°F / 66–68°C |
| Well-done | 160°F+ / 71°C+ |
These are culinary doneness ranges, not a replacement for food-safety guidance. USDA consumer guidance calls for whole beef, pork, lamb, and veal cuts to reach at least 145°F (63°C) followed by a three-minute rest.
That distinction is important. A restaurant-style doneness chart and an official minimum safe cooking recommendation are answering slightly different questions.
Why Ground Meat Needs More Heat
I used to wonder why a steak and a hamburger could have different recommended safe temperatures even though both were beef.
The reason is the structure of the meat.
With an intact steak, contamination is primarily a concern at the surface, which gets exposed directly to high heat during cooking.
When meat is ground, anything that was on the surface can be mixed throughout the entire burger.
That’s why USDA guidance recommends cooking ground beef, pork, lamb, and veal to 160°F (71°C).
It’s one of those food-safety rules that makes much more sense once you understand the reason behind it.
Chicken and Turkey: 165°F Is the Number I Remember
If someone only wanted to remember one meat temperature, I’d probably make it 165°F (74°C) for poultry.
USDA guidance recommends this internal temperature for whole poultry, poultry pieces, and ground poultry.
I check the thickest part of chicken breasts and avoid touching bone.
With a whole bird, I check multiple locations because different sections cook at different speeds. The thighs, breasts, and joints aren’t necessarily at the same temperature just because the skin looks beautifully browned.
This is also why I don’t rely on the old advice to cook chicken until “the juices run clear.” Color can be misleading.
A thermometer gives me a much better answer.
Pork Doesn’t Need to Be Cooked Until It’s Dry
I grew up with the idea that pork needed to be cooked until there wasn’t a hint of pink left in it.
That often produces very dry pork.
For whole cuts such as pork chops and pork tenderloin, USDA guidance is 145°F (63°C), followed by at least a three-minute rest. Ground pork should reach 160°F (71°C).
That makes a big difference.
A thick pork chop taken to the proper temperature can stay tender and juicy instead of turning into something that requires serious effort to chew.
Again, temperature beats trying to judge doneness purely by color.
Fish and Seafood Temperatures
Fish is another food where a few minutes can make an enormous difference.
As fish cooks, its flesh changes from translucent to increasingly opaque and firm. Go too far and moisture disappears quickly.
FDA guidance recommends cooking most seafood to an internal temperature of 145°F (63°C). It also gives useful visual signs: fish should become opaque and separate easily with a fork, while shrimp, scallops, crab, and lobster become firm, pearly, and opaque.
I find visual cues particularly useful with thin fish fillets because getting a thermometer perfectly into the center isn’t always practical.
For shellfish such as mussels and clams, I look for the shells to open during cooking and discard those that remain closed, in line with FDA guidance.
Egg Temperatures and Why They Can Be Confusing
Eggs are slightly awkward because we intentionally eat them at many different levels of doneness.
A jammy boiled egg, a runny fried egg, scrambled eggs, custard, quiche, and hard-boiled eggs all behave differently.
For straightforward home food safety, FDA advice is to cook eggs until the yolk and white are firm and to cook egg-containing dishes such as casseroles to 160°F (71°C). Recipes intended to remain raw or undercooked are safer when made with pasteurized eggs or egg products.
For everyday cooking, though, I tend to judge individual eggs more by texture than by trying to insert a thermometer into them.
Temperature becomes much more useful with larger egg dishes such as quiche, strata, or breakfast casseroles.
Water Temperatures: Poaching, Simmering, and Boiling
One of the biggest improvements I made to my stovetop cooking was realizing that boiling isn’t one single setting.
Water behaves very differently at a gentle poach than it does at a violent rolling boil.
Here are the approximate ranges I use:
| Technique | Approximate Water Temperature |
|---|---|
| Gentle poaching | 160–180°F / 71–82°C |
| Simmering | 185–205°F / 85–96°C |
| Boiling at sea level | 212°F / 100°C |
Poaching
At poaching temperature, I expect relatively little visible movement in the water.
This gentler heat is useful for delicate foods such as eggs, fish, and chicken.
Simmering
A simmer has regular small bubbles but isn’t violently churning.
I use this for soups, stews, sauces, beans, and braises.
One of the most common mistakes I see is a recipe saying “simmer” while the pot is boiling aggressively. Turning the burner higher doesn’t necessarily make the food better. It can make meat tougher, break delicate ingredients apart, or reduce a sauce too quickly.
Boiling
A full boil is appropriate when I actually want vigorous heat: pasta and blanching vegetables are obvious examples.
Water boils at approximately 212°F (100°C) at sea level, although the boiling point decreases as elevation increases.
Oven Temperatures and What They Actually Mean
I don’t think of oven temperatures as arbitrary recipe numbers anymore.
Different oven temperatures produce different kinds of cooking.
Here’s the rough mental framework I use:
| Oven Temperature | How I Think About It |
|---|---|
| 250–300°F / 120–150°C | Very low and slow |
| 300–325°F / 150–165°C | Low |
| 325–375°F / 165–190°C | Moderate |
| 375–425°F / 190–220°C | Moderately hot |
| 425–475°F / 220–245°C | Hot roasting |
| 475°F+ / 245°C+ | Very high heat |
These aren’t rigid categories. They’re simply useful shorthand.
Lower oven temperatures
Low heat gives the interior of food more time to cook before the exterior becomes aggressively browned.
That’s useful for certain braises, slow roasts, delicate baked goods, and foods where gentle cooking matters.
Moderate temperatures
The 325–375°F range is where a huge amount of everyday baking happens.
Cakes, casseroles, cookies, breads, and baked dishes frequently live somewhere in this territory.
Higher temperatures
Once I get into the 400°F+ range, I’m usually looking for more aggressive roasting and browning.
Vegetables are a perfect example.
If I crowd a tray of vegetables into a relatively cool oven, they release water and soften.
Give them space and sufficient heat, and I get browned edges and concentrated flavor instead.
Why Your Oven Temperature May Be Wrong
There’s another important lesson buried inside all those oven numbers:
The number on the oven display isn’t necessarily the temperature inside the oven.
Many home ovens cycle above and below their target temperature. Some consistently run hot or cold. Different areas of the oven can also be warmer than others.
If baked goods repeatedly brown too quickly, take much longer than recipes suggest, or cook unevenly, I wouldn’t immediately assume the recipe is bad.
An inexpensive oven thermometer can reveal a surprising amount.
I also give the oven enough time to preheat properly. The preheat alert tells me that the air near the oven’s sensor has reached a certain temperature; it doesn’t necessarily mean every wall, rack, and heavy metal component inside the oven has completely stabilized.
For temperature-sensitive baking, a little extra preheating time can help.
Conventional Oven vs. Convection
Convection ovens use a fan to circulate hot air.
That moving air transfers heat efficiently and can help food cook and brown faster.
As a general starting point, when adapting a conventional-oven recipe for convection, I often reduce the temperature by about 25°F (roughly 15°C) or begin checking the food earlier.
But I don’t treat that as a universal law. Convection systems vary considerably between ovens, and many modern recipes already specify whether they were written for fan-assisted cooking.
The more I use a particular oven, the more useful its behavior becomes than any generic conversion rule.
Frying Oil Temperatures
Deep frying taught me perhaps the clearest example of why temperature matters.
If the oil isn’t hot enough, food sits in it for too long and tends to become greasy.
If it’s too hot, the outside can brown or burn before the inside cooks.
For most frying, the useful range is roughly:
325–375°F (165–190°C)
I usually aim somewhere around 350°F (175°C) unless the recipe has a reason to specify otherwise.
There is another complication: adding cold food causes the oil temperature to drop.
That’s why overcrowding a fryer or Dutch oven is such a problem. A large batch can pull the oil temperature down dramatically.
Rather than getting crisp food, I end up with food slowly soaking in comparatively cool oil.
Working in smaller batches gives the oil time to recover.
Smoke Point Is Not the Same as Frying Temperature
Every cooking oil has a temperature at which it begins visibly smoking and degrading.
That’s its smoke point.
The exact number varies with the type of oil, how refined it is, its age, and other factors, which is why I don’t obsess over charts claiming an oil has one perfectly fixed smoke point.
The useful principle is simpler:
For high-temperature cooking, I choose an oil suitable for high heat and avoid repeatedly pushing it until it is smoking heavily.
Smoke is not a sign that my pan has finally become “hot enough.” It’s often a sign I’ve gone too far.
Pan Temperature and Browning
Unlike an oven, my frying pan doesn’t have a convenient digital display.
So stovetop temperature is usually something I judge from behavior.
For sautéing, I want food to make a clear sizzle when it enters the pan.
For searing meat, I want the surface hot enough to brown quickly.
But extremely hot isn’t automatically better.
If the pan is far too hot, spices burn, butter blackens, and the exterior of food can scorch before the inside cooks.
I’ve found it more useful to think in terms of matching heat to the job:
- Low heat for gentle cooking and keeping food warm
- Medium-low for delicate eggs and slow softening
- Medium for much of everyday cooking
- Medium-high for browning and sautéing
- High heat for specific jobs where very fast cooking or searing is useful
And even those settings are relative. “Medium” on one stove can behave like medium-high on another.
Learning the personality of my own stove has been much more valuable than blindly following burner settings in recipes.
Browning Needs Heat — and a Dry Surface
The flavorful brown crust on roasted meat, toasted bread, and seared vegetables is largely associated with a collection of chemical reactions known as the Maillard reaction.
You don’t need the chemistry lesson to use it.
The practical lesson is that browning happens much more effectively once the surface of food gets hot and relatively dry.
Water gets in the way because a wet surface spends energy evaporating moisture instead of quickly climbing to browning temperatures.
That’s why I pat meat dry before searing it.
It’s also why overcrowding a pan causes problems. Several pieces of food release moisture at once. Instead of escaping immediately, steam collects around the food.
Suddenly I’m steaming instead of browning.
A hotter pan can help, but sometimes the better answer is simply less food in the pan.
Sugar Temperatures
Sugar is one place where I stop relying on visual intuition and reach for a thermometer.
As a sugar syrup heats and water evaporates, the sugar concentration increases. Pastry cooks use specific temperature stages because the syrup behaves differently when cooled.
The classic ranges are approximately:
| Sugar Stage | Temperature |
|---|---|
| Thread | 230–235°F / 110–113°C |
| Soft ball | 235–240°F / 113–116°C |
| Firm ball | 245–250°F / 118–121°C |
| Hard ball | 250–265°F / 121–129°C |
| Soft crack | 270–290°F / 132–143°C |
| Hard crack | 300–310°F / 149–154°C |
| Caramel | Around 320°F / 160°C and above |
This is very different from everyday cooking because five or ten degrees can completely change the final texture.
If I’m making caramel, brittle, fudge, or another temperature-sensitive confection, this is one situation where precision really matters.
And hot sugar deserves particular respect. Sugar syrup can become far hotter than boiling water and sticks to skin, making burns especially dangerous.
Baking Temperatures Aren’t Just About the Oven
Baking made more sense to me once I realized I could sometimes measure the food itself instead of relying entirely on appearance.
Bread is a good example.
Depending on the style, many breads finish somewhere around 190–210°F (88–99°C) internally. Lean crusty breads are often toward the upper end, while richer or softer breads may finish lower.
I still look at the crust, structure, and feel of the loaf, but temperature gives me another piece of information.
The same principle applies to many baked foods.
The oven temperature controls the environment.
The food’s internal temperature tells me how far the cooking has progressed.
Resting Meat Is Part of Cooking
I used to think resting meat was an optional final step added by overly fussy recipes.
Now I consider it part of the cooking process.
During resting, two useful things are happening.
First, carryover heat continues moving through the meat.
Second, juices that have been driven around by heat have some time to redistribute as the meat cools slightly.
Cutting into a large roast the instant it leaves the oven usually isn’t doing it any favors.
How long I rest something depends on its size. A small steak needs far less time than a large roast or whole turkey.
And for whole cuts of beef, pork, lamb, and veal cooked to the USDA minimum of 145°F (63°C), that minimum guidance specifically includes a rest of at least three minutes.
Reheating Food
Reheating is another place where “feels hot” isn’t always a useful standard.
For leftovers, 165°F (74°C) is the temperature I remember. FDA consumer guidance recommends reheating cooked egg dishes to 165°F, and 165°F is also commonly used as the safe reheating target for leftovers.
The biggest challenge is usually even heating.
A microwave can create extremely hot areas right beside surprisingly cold ones. That’s why I stir food when possible, rotate it, and check more than one location.
Large portions also reheat unevenly, so dividing them into smaller amounts usually works better.
Temperature Isn’t the Only Sign That Food Is Done
After spending an entire article telling you how useful temperature is, there’s an important caveat:
Not everything should be cooked by thermometer.
I don’t stick a probe into every roasted carrot.
I don’t measure the internal temperature of pasta.
I don’t decide whether onions are caramelized by checking a number.
Cooking still involves sight, smell, sound, texture, and taste.
I look for:
- Browning
- Crispness
- Tenderness
- Bubbling
- Thickening
- Aroma
- Color changes
- Resistance when pierced
- How easily food separates
- How something tastes
Temperature is another sense I can add to that list.
It’s particularly valuable when visual clues are unreliable or when food safety is involved.
My Quick Cooking Temperature Cheat Sheet
If you don’t want to remember everything in this guide, these are the numbers and ranges I’d keep nearby:
| What You’re Cooking | Temperature |
|---|---|
| Whole beef, pork, lamb or veal cuts | 145°F / 63°C + 3 min rest |
| Ground beef, pork, lamb or veal | 160°F / 71°C |
| Poultry | 165°F / 74°C |
| Fish | 145°F / 63°C |
| Egg dishes | 160°F / 71°C |
| Reheated leftovers | 165°F / 74°C |
| Poaching water | 160–180°F / 71–82°C |
| Simmering water | 185–205°F / 85–96°C |
| Boiling water at sea level | 212°F / 100°C |
| Typical frying oil | 325–375°F / 165–190°C |
| Moderate oven | 325–375°F / 165–190°C |
| Hot roasting oven | 425–475°F / 220–245°C |
| Sugar begins caramelizing | Around 320°F / 160°C |
I wouldn’t try to memorize the whole table at once.
If you’re starting out, remember 145, 160, and 165°F for common food-safety situations, learn roughly what simmering and boiling look like, and get comfortable using a thermometer.
Everything else becomes much easier with experience.
The Most Important Thing I’ve Learned About Cooking Temperatures
The biggest change for me wasn’t memorizing a collection of numbers.
It was realizing that heat is something I can control rather than something that simply happens to food.
If vegetables aren’t browning, I can ask whether they’re too wet, crowded, or cooking at too low a temperature.
If chicken keeps turning out dry, I can stop relying on an arbitrary cooking time and start checking its internal temperature.
If fried food is greasy, I can check whether the oil is cooling too much between batches.
If a sauce is reducing too aggressively, I can turn a boil into a simmer instead of assuming I simply need to stir faster.
That’s the real value of understanding cooking temperatures.
You stop following heat settings blindly and start understanding what they’re doing.
And once that happens, recipes become less like rigid instructions and more like guides. You know what you’re trying to achieve, you can see when the food is moving in the right direction, and you know how to adjust when it isn’t.
For me, that’s one of the clearest dividing lines between simply following recipes and actually becoming comfortable in the kitchen.